

You will need
Black cat eye sunglasses (mine were £1 from Primark, no haggling required!)
Polymer clay (about £2 in most craft shops but prices may vary)
Gold polymer clay powder by Fimo (£3.25 at play.com)
Clear car lacquer (£3.49 with postage and packing on Ebay)
Scalpel (potentially deadly - what's your price?... Just kidding!)
Glue gun
Difficulty

Quite easy
It would depend on how fussy you want to make your clay design and how confident a small-scale sculptor you are, but if you follow my tips, it is easy once you know how.
Time
2 hours, excluding clay baking time and various drying times. The former will vary according to your choice of clay but they tend to need around half an hour or less.
Going for baroque...

If, like me, you're meticulous to an anal degree, you might want to sketch out two shapes for your flower designs - one for the top corners of the frames and one for the temples - and trace them through on both sides as a guide. This is to make sure that your shapes are more or less symmetrical and not a random hodge-podge. We don't do hodge-podges here at Chic Cheat, nor do we recommend you do such a thing!

As I mentioned, you're using your templates as a guideline. The best method for ornate leafy. rosy patterns that I know is to roll your clay into long sausagey shapes (ahem, no smirking please, ladies!), cut lines into them with a scalpel and smooth them along the sides so that they have a kind of v-shaped cross-section and, thus, a faceted look.
For the roses, squash down domed, circular blob of clay and furrow holes out of it with a scalpel, pulling the clay above it up as you go along and creating a petal-like texture.

Once you've sculpted all your (master-)pieces, paint them with your gold powder and water, leave to dry (they may still molt slightly so try to avoid touching them) I'd recommend carrying them on a piece of paper to the oven for baking. Follow the instructions closely (unlike I once did when I misread 240°F for 240°C, resulting in an acrid mess - just throwing the idea out there!) and bake your clay.

Next, you'll need a good fixative. I used clear car lacquer. Just give your pieces one blast of it and leave them for a few minutes to dry.

Stick your pieces in place with a glue gun.
And finally...

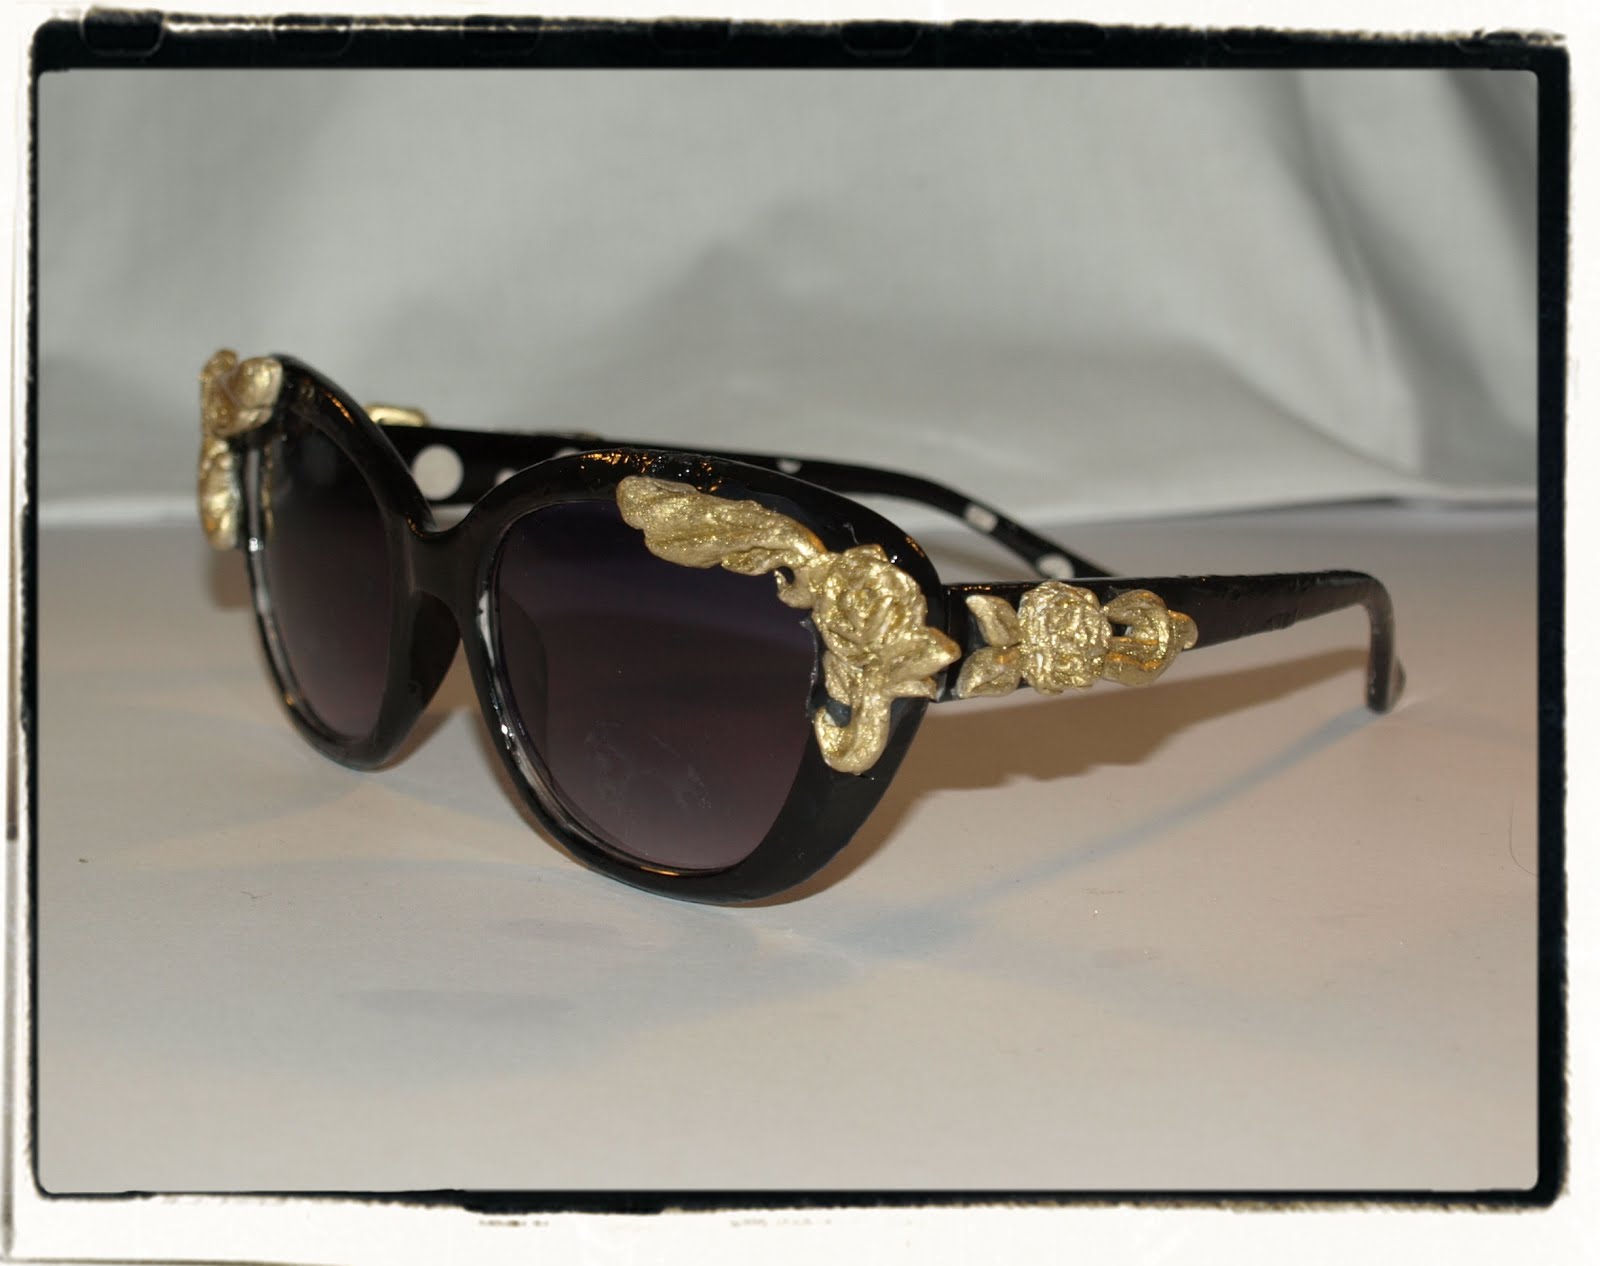


...there you have it!
you are a genius!!!
ReplyDelete-obsessedbysunglasses-
Thanks so much! Just checked out your blog. Nice site! I like the way you've chosen to specialise and go for a quirky angle :)
ReplyDelete[...] Full tutorial: chiccheat.co.uk [...]
ReplyDeleteAhhh! This is an amazing DIY! I love it; thanks for the idea!
ReplyDelete