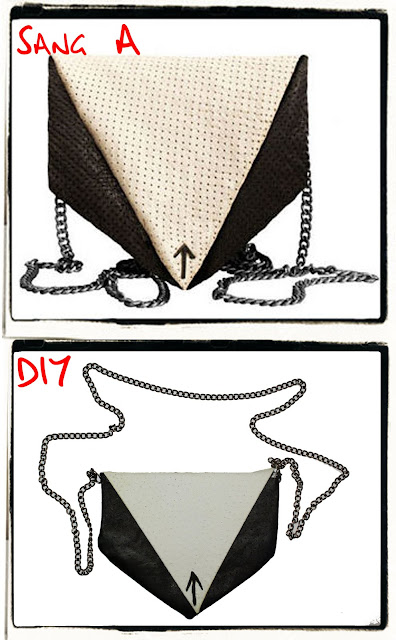
You will need
About 2 square foot of black leather/ faux leather and 1 square foot in white. Both can be pretty pricey so why not cut up some old jackets. If you haven’t got one, or both, comb your local charity shop or look online.A sewing machine with a leather needle nothing too technical, available at all good haberdashers and a precaution that’s definitely worth taking. Conventional needles aren’t strong enough and tend to break.
Craft mount
Piercing tool which looks like a scalpel but is pointed at the end.
All-purpose scissors
4 sheets of A4 paper and masking tape
Pencil Preferably a clutch pencil, either way, make sure it’s sharp.
Patternmaster or graded setsquare
Gold gel pen
Black polymer clay
Gunmetal bag chain about 150cm long. I know it sound like a lot but it is for a cross body bag.
Silver picture hanging wire
Glue gun
Difficulty
Pretty easy
Don’t let a bit of machine sewing and basic pattern cutting phase you, this is among my quicker, easier outings.Time
2-3 hoursHow to make the 'V' thing
Trace out the above pattern pieces onto paper using the measurements provided. You’ll need to tape 2 sheets together for the bottom right-hand piece. Cut your pieces out.
Trace the piece in the top left-hand corner onto white leather/ faux leather and the other two pieces onto black (onto the wrong sides) using the gold gel pen. Cut them out. Trace out the bottom left-side pattern in white twice, without the seam allowance.
Prod holes in your black pieces and triangular white piece.
Place your black pieces right-side-to-right-side and machine sew them together along the sides and bottom. Trim away the sides, leaving one layer slightly wider than the other. This makes it easier to turn your bag inside-out and prevents excess bulk and distortion.
Craft mount your non-triangular white pieces to your black pieces (the wrong sides, which should still be facing outwards.
With your white triangular piece, fold back the seam allowance towards the wrong side and craft mount it down.
Turn your bag right-sides-out. On the triangular part of your black pieces, fold the seam allowance back on itself, this time, towards the right side and craft mount it down. Cover that side in craft mount.
Stick your white piece down on your craft mount-covered black piece, with the right side facing outwards.
Attach your chain to the top corners by threading your picture wire through nearby holes and the end links on either side.
Make your polymer clay arrow, bake in the oven (following the instructions carefully as I trust you will!) and stick it in place with your glue gun.


No comments:
Post a Comment