Sunday, 6 April 2014

Take a bow - How to DIY a headband in the style of Christian Louboutin

I made a headband with a painterly floral style inspired by Christian Louboutin's Loubibow flower clutch.

I have loads of bags and thought I'd do something different with the Christian Louboutin's painterly take on florals.

For my headband you will need...


NB: If you're not making the headband, why not try making a satin bow for a matching satin-covered clutch. If you can't find a match, try covering your bag in fabric, using Craftmount first.

Difficulty

For the paint effects

Pretty easy

It's technique-led but generally straightforward and quick.

For the headband/ bow

Moderate

Satin can be difficult and painstaking to work with, as it's so slippery, so I'd call it moderately challenging.

Time


3-4 hours - you could probably complete the project in an evening.

 A bow in bloom


Cut four pieces of satin, measuring 40cm in length using the following pattern:

Take two pieces and pin them together with the right sides (the shiny ones) facing each other and the wrong sides (the matte ones) facing outwards. Sew all of the sides together - with the stitches 1cm from the edge - apart from the narrow ones at the tip.

Cut away some (not all) of the excess fabric around the stitching with one layer slightly wider than the other, forming a 'step' effect.

Turn the piece inside out and press it so that the stitching is along the edge and the fabric around it is flush. Turn the non-stitched edges inside by 1cm and press them flat.

Repeat the process with the remaining two pieces of satin.


Cut out the elastic section of the headband and feed the tips inside the non-stitched edges of the two pieces. Top stitch them as close to the edge as possible.

If you're making the bow for a bag, now would be the time to attach the pieces to the flap or front.
Now for the paint effects!


I used two techniques for this; the first one involves dipping your paintbrush in silk paint, dabbing it with a tissue so that it's dry but the paint is still intact and flicking it in a quick streak so that it tapers off.


The other technique involves allowing your brush to get a bit dirty by using numerous colours or not completely cleaning them away before adding more paint. This allows different coloured paint to build up along the bristles. Use the whole length of the bristles, place them flat on the fabric and roll the brush to help them blend.


Tie the two pieces together.


Wednesday, 2 April 2014

The Trends on Wednesday: Phe-norm-enon


"You're not going out in that - it's too formal! You look like you're going to a party! People will be dressed casually in shorts and t-shirts. It'll be completely inappropriate for what we're going to be doing. Put on something snug and practical." That baying imperative left my mum's mouth throughout my teenagehood - a time spent in the glare of late 90s girl band glamour - and on many an occasion over the past decade, as I battled her sartorial sanctions. Maybe I should be sorry, because maybe - just maybe - my mother was at the forefront of avant garde fashion forecasting, with insight so cutting edge it was decades ahead of its time. Yes, fast forward 15 years (or just skip the track - duh! More on technology later) and it's purists' practicality that the cool kids are wearing, or normcore as it is currently known.

Fashion has ventured beyond the obnoxious 'irony' of the hipster look to outright avoidance of fashion's standard fare: commercialised branding, transient fads and conventional glamour. Key pieces for the summer include Céline's skater shoes, Prada's crystal hiking sandals, unfitted jeans and tracksuit bottoms, grey marled sweatshirts and 'ugly' pool shoes (perchance bringing new meaning to the term, 'poolside glamour'). Some see it as a shift of paradigm from binding, ornamental sufferance for one's style to comfort: a slow-burning zeitgeist reacting against years of impractical, constrictive opulence. Richard Nicoll, a designer with a penchant for relaxed-fitting, timeless staples said: "fashion in the last five to 10 years has been quite shouty and bold. It's an old-fashioned idea that aesthetics matter above comfort. It's outdated." Within that timeframe - one which began with the 'fierce' look of binding bandage dresses at Christopher Kane, hazardous, tottering heels and short bodycon dresses at Burberry and Balmain that groaned under the weight of rhinestones - the world caught up with the elusive glamour of the privileged few, with reality TV shows trailblazing their take on catwalk fashion and reworking desirable looks through face-contouring makeup and immaculately tonged hair. The elusive became ubiquitous, so fascination turned to the 'off duty' aesthetic on celebrities. This new approach is echoed by designers. in their mission to make the wearer feel good because the clothes are good to wear. If you consider the Mary Quant quote: "The fashionable woman wears clothes. The clothes don't wear her," perhaps it's not such a new idea, after all. By the same token, it's not thought to be the end of an era for ostentation either. Be prepared for the pendulum to swing back towards binding, tottering glamour over the next five years!


Maybe a shift back to flamboyance wouldn't be so bad in the long term. Since the bland, anti-style ethos of normcore begun in the summer of 2013, it's seen its share of controversy and disapproval. The concept of embracing sameness as a way of looking cool, rather than striving for individuality was born in a world of frenetic technology and communication. Everything is so easy to find, research and publish via the internet, that "everyone is a researcher now" according to Natasha Stagg, the Online Editor of V Magazine. Trends and cycles happen so fast that the concept of staying current is no longer possible or existent. It is for this reason that trend forecasting collective, K-HOLE identify normcore by conceptual rather than aesthetic means - as co-founder Emily Segal asserts, “it’s not about being simple or forfeiting individuality to become a bland, uniform mass, (rather, it's about) seeing (recognisability) as an opportunity for connection, instead of evidence that your identity has dissolved.”


It is a salient point that the normcore mentality offers a means of sartorial discourse instead of individualistic flamboyance. I'd rather not have to forfeit any of the artistic expression in my dress sense simply to not look sad and old hat - apparently, neither would Grayson Perry.To quote Henry Van Dyke: "Use what talents you possess; the woods would be very silent if no birds sang except those that sang best." The same principle applies, surely, with sartorial expression. Where the normcore mentality might just be right, however, is that fashion, like any art form, is read and decoded as a set of signs. If we are to take the reins of communication and break new ground, perhaps it should be done, not with what we want to say in mind but how we know people are going to read it and where we fit within the wider discourse of fashion. It ain't what we say, it's what the world says it is. Face it, you're unique - just like everyone else!


Monday, 31 March 2014

My DIY Stella McCartney black lipstick intarsia jumper


My birthday celebrations (plural intended - the Queen has nothing on me!) ended with a leisurely weekend on the south coast. So, did that mean I was going to slack off with blog projects? Why, heavens, no! I used some spare time over the previous week crocheting a DIY Stella McCartney black intarsia lipstick jumper with the exact same method as this project  that you might remember - only working from a different design, obviously! I mixed it up with a few more projects of old to create a bold red statement and now you lucky things get to see the results!


Monday, 24 March 2014

Hand haute - How to DIY a Vivetta White Rachelle Hands Shirt

Get a surreal deal with this Elsa Schiaparelli-style shirt refashion!

Top image: Style.com

You will need...


It also helps to have a fine-tipped pen, pencil or tailor's chalk to trace out the hand design onto your collar.

I will be using a template for the hand design, so you might find it helpful to print the shape out, but a printer is completely optional (and has to be worth the sanity it typically costs you, in my experience!).

Difficulty

Easy

Nothing struck me as particularly challenging for this one but, as always, care and love are needed for best results.

Time

About 2 hours.

Hand it over!


Pin the pattern paper to the collar of your shirt and trace the edges, so that you know what size to make your hand template.

Copy or print out the above hand design and trace it onto your pattern paper to fit the collar outline you have drawn. Make sure the thumb, index and middle fingertips touch the edges of the collar outline - it's even better if you can get the other tips to fit the collar shape but all collars are different!
Cut out your template and trace the hand design onto each side of the collar. You will have to turn your paper over when you change sides, in order to get the design symmetrical.

Cut out the hand design and cut away the edge of the collar along the middle, so that the new edges are raw, with no top stitching.
Paint black 'nails' onto each finger on the top layer and leave them to dry. You should be left with two layers of fabric along the collar - both of which are cut into the hand design. Iron interfacing onto the inside areas (the 'wrong' sides) of the two layers.
Cut away the excess interfacing and top stitch the two layers together about 1mm from the edges, or as close to them as possible.

Tip: It helps to use glue to hold the layers together while you sew them. Make sure your glue's fairly dry and not slimy, like gemstone glue. I used craft mount.
My shirt was short-sleeved, so I added some broderie anglaise trim (2012's finest!) along the cuffs.

DIY Vivetta Hands shirt


Sunday, 16 March 2014

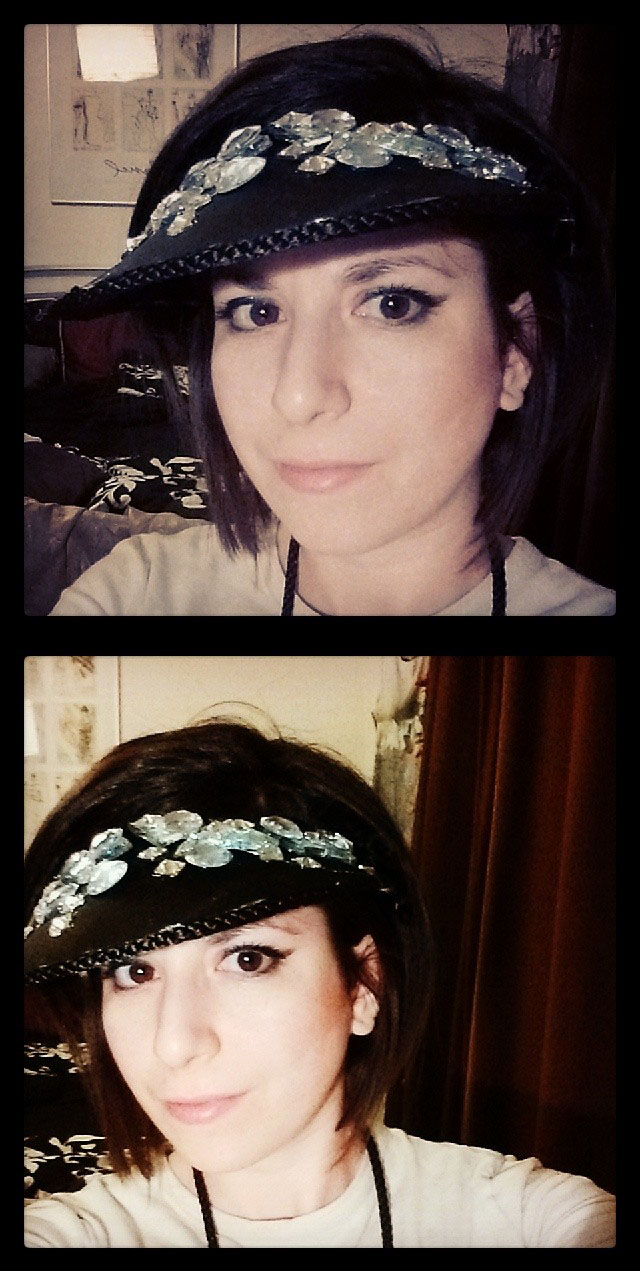
Marni, Marni, Marni - How to DIY a Marni Visor

Marni's attention-grabbing accessory is a 'shade' more experimental as a style statement!

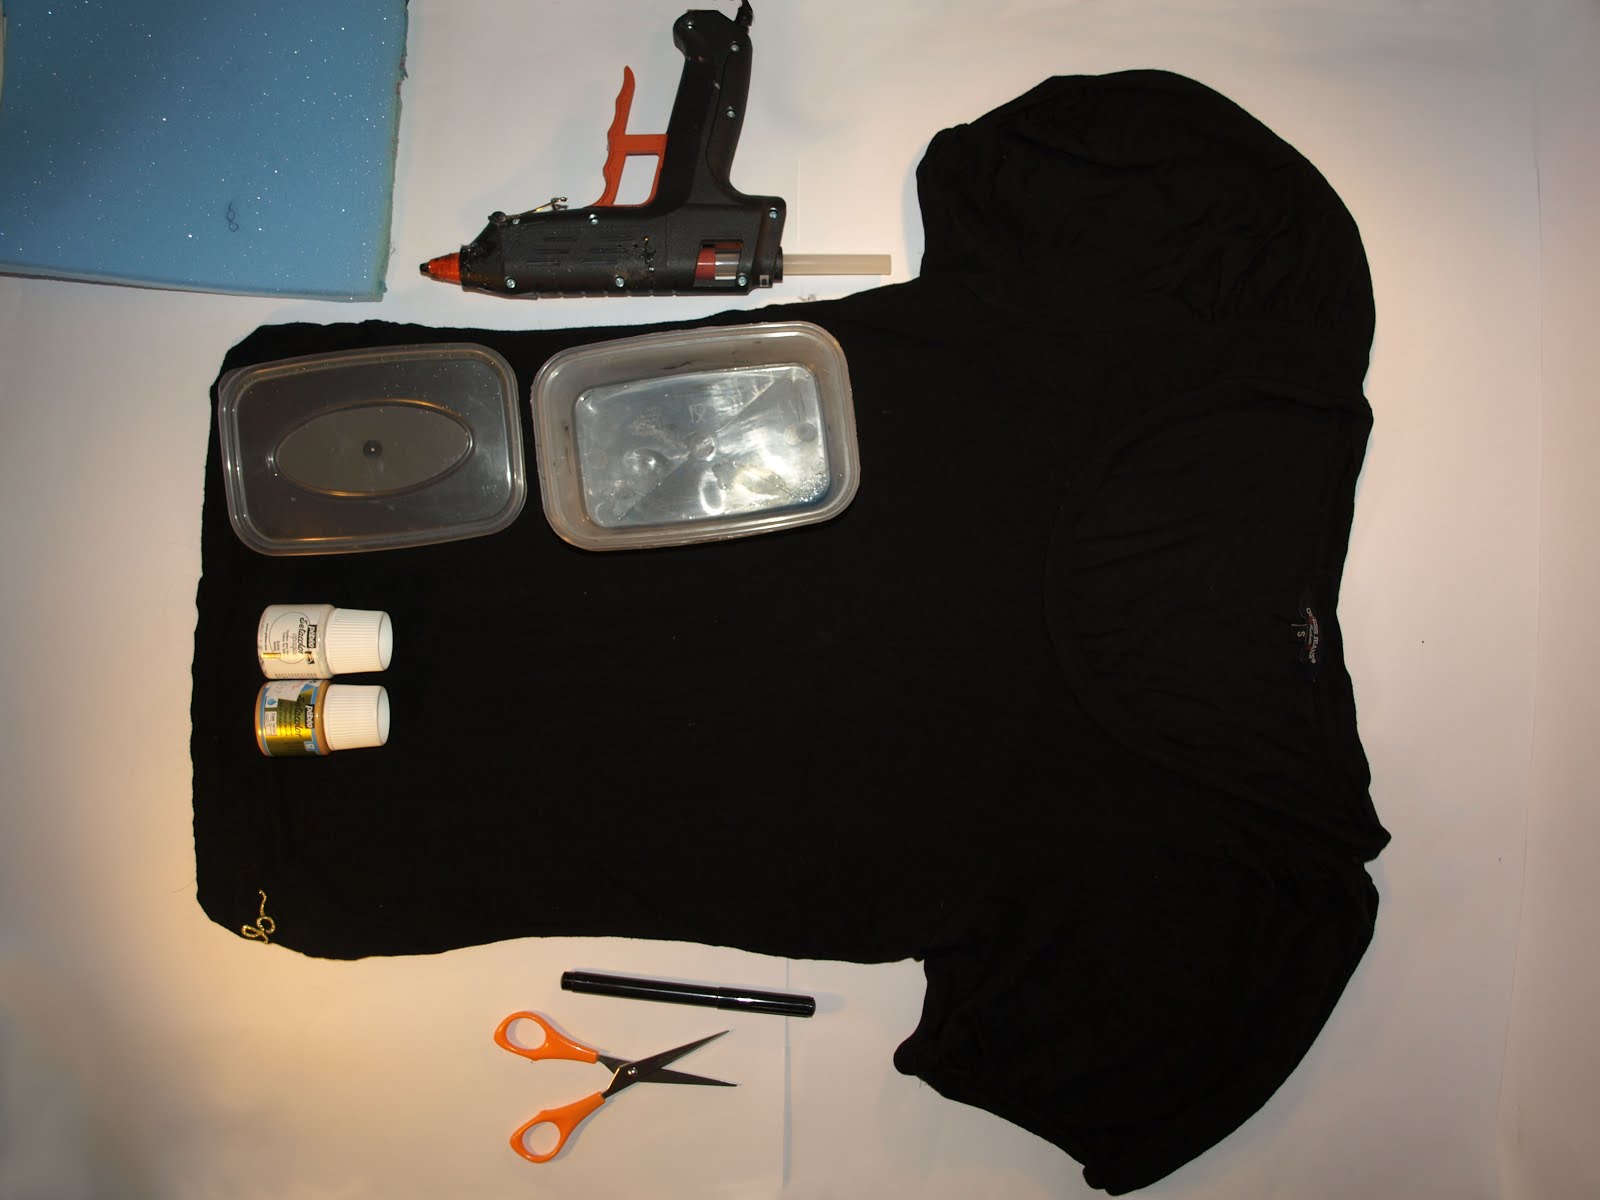
You will need...


Just to clarify, you need 180cm of rope.

I got my visor from Hobbycraft and would recommend it. Alternatively, you can cut out a piece of foam 24cm wide, in the shape of the template, below.


Difficulty


Pretty easy

I can't think of anything too challenging or painstaking with this project but I figured I'd err on the side of caution and not declare it a total doddle.

Time

2-3 hours, I think.However, it is amazing how little you can keep track of time in the company of Mr. Television so I'm not entirely sure I'd like to give it  a more specific timeframe than 'a leisurely evening,' if that makes sense.

Re-visory


Remove the strap from the visor and use craft mount to cover both sides of it in satin, ensuring the right side of the fabric is showing.
Use the glue gun to attach rope along the edges.


Punch holes in the corners; you can use a hole punch, scalpel or even scissors. Cut two pieces of rope about 50cm in length, thread them through the holes, tie them in knots and secure them using the glue gun.


Thread the two lengths of rope through the tassels, fold them back on themselves and secure them using the glue gun.


Monday, 10 March 2014

D-Eye-Y - How to DIY your own eye-printed clothing

The eyes have it this season!

If the blog and street style avenues are to be believed, Kenzo's eye prints - and anything resembling them, as I'm sure the high street will be quick to point out - are the motif to be seen with right now, so I thought I'd share a nifty little tip for recreating the pattern.

You will need...


NB: My foam was about 1cm thick.

Difficulty

Quite easy

...But not as easy as I thought before I tried it. This isn't a particularly long or complicated project but it's more reliant on skill than I initially thought. As ever, I can guide and advise you so that you don't find it so hard. You can also practise on some scrap fabric to get the feel.

Time

An evening...well, a few hours. Sorry, I got a bit lost in the project so I wasn't counting!

Timings for this project depend largely on the number of eye motifs you're looking to do; if you're only doing one it will take less than an hour but if you're covering your top it will take significantly longer.

Eye-eye!

Cut out the circle and eye shapes into your foam using the above template. I made my circle about 9cm in diameter and the eye about 4cm from the tips of the eyelash.


Now to craft some stamps! Cut the lid of your box into smaller pieces that cover your foam shapes and glue the shapes to them.


Use the paintbrush to wet the surface of your stamps; don't apply it too thickly or allow it to drip. Also, don't let any paint get onto the plastic as this will cause the design to smudge when you press it down - wipe excess paint away, if necessary. Stamp your design down, pressing firmly to ensure that the whole design is transferred onto the fabric. Don't press too hard, as this will also cause smudging.

Repeat this process until your design is complete.

Loving the stamp action? Check out this tutorial.

Monday, 3 March 2014

Haute metal - how to DIY your own metal plated cut out shoes

Cutting it with an on-trend upcycle!

You will need...


NB: Use brass sheets as they're a soft, reasonably pliable metal. I got mine here.

The snips I used are called tin snips.

*Relax, the lighter is optional and not recommended for faux leather shoes or near flammable furniture!

** Make sure you use metal araldite glue; only a solvent of that strength is going to work!

Difficulty

Quite hard

This one did prove to be more of a challenge than expected; working with metal is very fiddly and demanding of elbow grease. However, since I had never worked with metal before, I learnt from the mistakes I made and will hopefully be able to guide you so that you don't find it so difficult.

Time

About two afternoons, so 8-ish hours. Again, I was disappointed that I didn't find it easier but I bit off more than I was expecting to chew with the metal. Thankfully, the results are totally worth it.

Cutting it...


Cut out small triangular areas on both sides of your shoes. Ensure they're symmetrical, identical in shape and in the correct places. You might want to trace your shape out on paper and use measurements as references.

After cutting your shapes out, use a lighter to smooth the edges (only if the shoes are leather - faux leather shoes would be ruined). Again, this part is completely optional and only applicable where appropriate, i.e. nowhere near flammable objects.
Finish the edges by gluing trim over them. You can use the scalpel to smooth away the excess glue or cut away extraneous blobs after they're dried.
Cut the above shapes out in metal with the amounts specified. The strips on the left are for covering buckles, so if the buckles of your shoes are already metal, you don't have to worry about them.

The shape in the middle is for the tips of the straps. It needs to be just wide enough to cover them but narrow enough to fit through the buckles. You might want to test it before bending it into shape and gluing it, to make sure that it fits; making a strap tip that's too wide, bending it into shape and then trying to cut it down is much harder, as I would know! The areas for folding back along the edges should be at least 1cm wide, as they're too hard to bend otherwise.
Once you have cut out the metal shapes for the tips of your straps, you may notice some fold lines in the template. I find it helps to draw them in place with a pen that can write on brass; for this, I used an extra fine silver marker.

Hold your piece of metal down and bend it with the tip of your pliers touching the line; I find this method's the easiest and requires the least brute force (something I don't have much of, especially in my hands and forearms!). Don't bend your side bits all the way as you will need to slip your straps underneath them.


Apply glue inside the metal tips and on the surfaces of the straps, and slot them into place.
The trapezium shapes, shown on the right of the template, will be placed over the arch of your foot - shoes follow that arch shape in the place where you're due to glue them - so bend them along the length. This will make them much easier to glue down.

Apply glue to the underside of the metal pieces and onto the surface where you intend to stick them. Again, make sure they're in the same places on both shoes.

Leave your glue to dry. You might have to leave it overnight. Make sure you leave it for as long as the instructions specify.


...and there you have it!