Saturday, 9 March 2013

Beads of a Bird: How to DIY a Shourouk Phoenix Necklace

The Pick Your DIY challenge order was of a phoenix!

You will need

2 box chain necklaces

1 A4 sheet of fine sculpting mesh

Car body filler (If you're nervous about using it, strong, carpentry-standard contact adhesive will do but it requires much more patience)

All-purpose scissors

Palette knife

Long-nosed pliers

Thin silver wire


84 diamantés or crystal beads (if you're using the latter, you'll also need some silver foil)

Nail polish in the following colours:


Difficulty


Quite easy

Believe it or not there are only 2 parts of the process that prevent this tutorial from earning an "easy" or even "very easy" certificate (or whatever means by which you classify tutorial difficulty). Those were using the wire to join some of the chains and applying the body filler and gems near the end in a neat, non-messy way. Confused? Fear not, all will be revealed.


Time

About 2 and a half hours.

No, seriously, I was pleasantly surprised at how little time it took to construct the necklace. Embellishing it was a slightly slower process but it's all still comfortably doable within an evening's time frame.


Fly on the wings of DIY...


This video shows how (yes, figuratively smart-arse!):


That masterpiece again...


Sunday, 3 March 2013

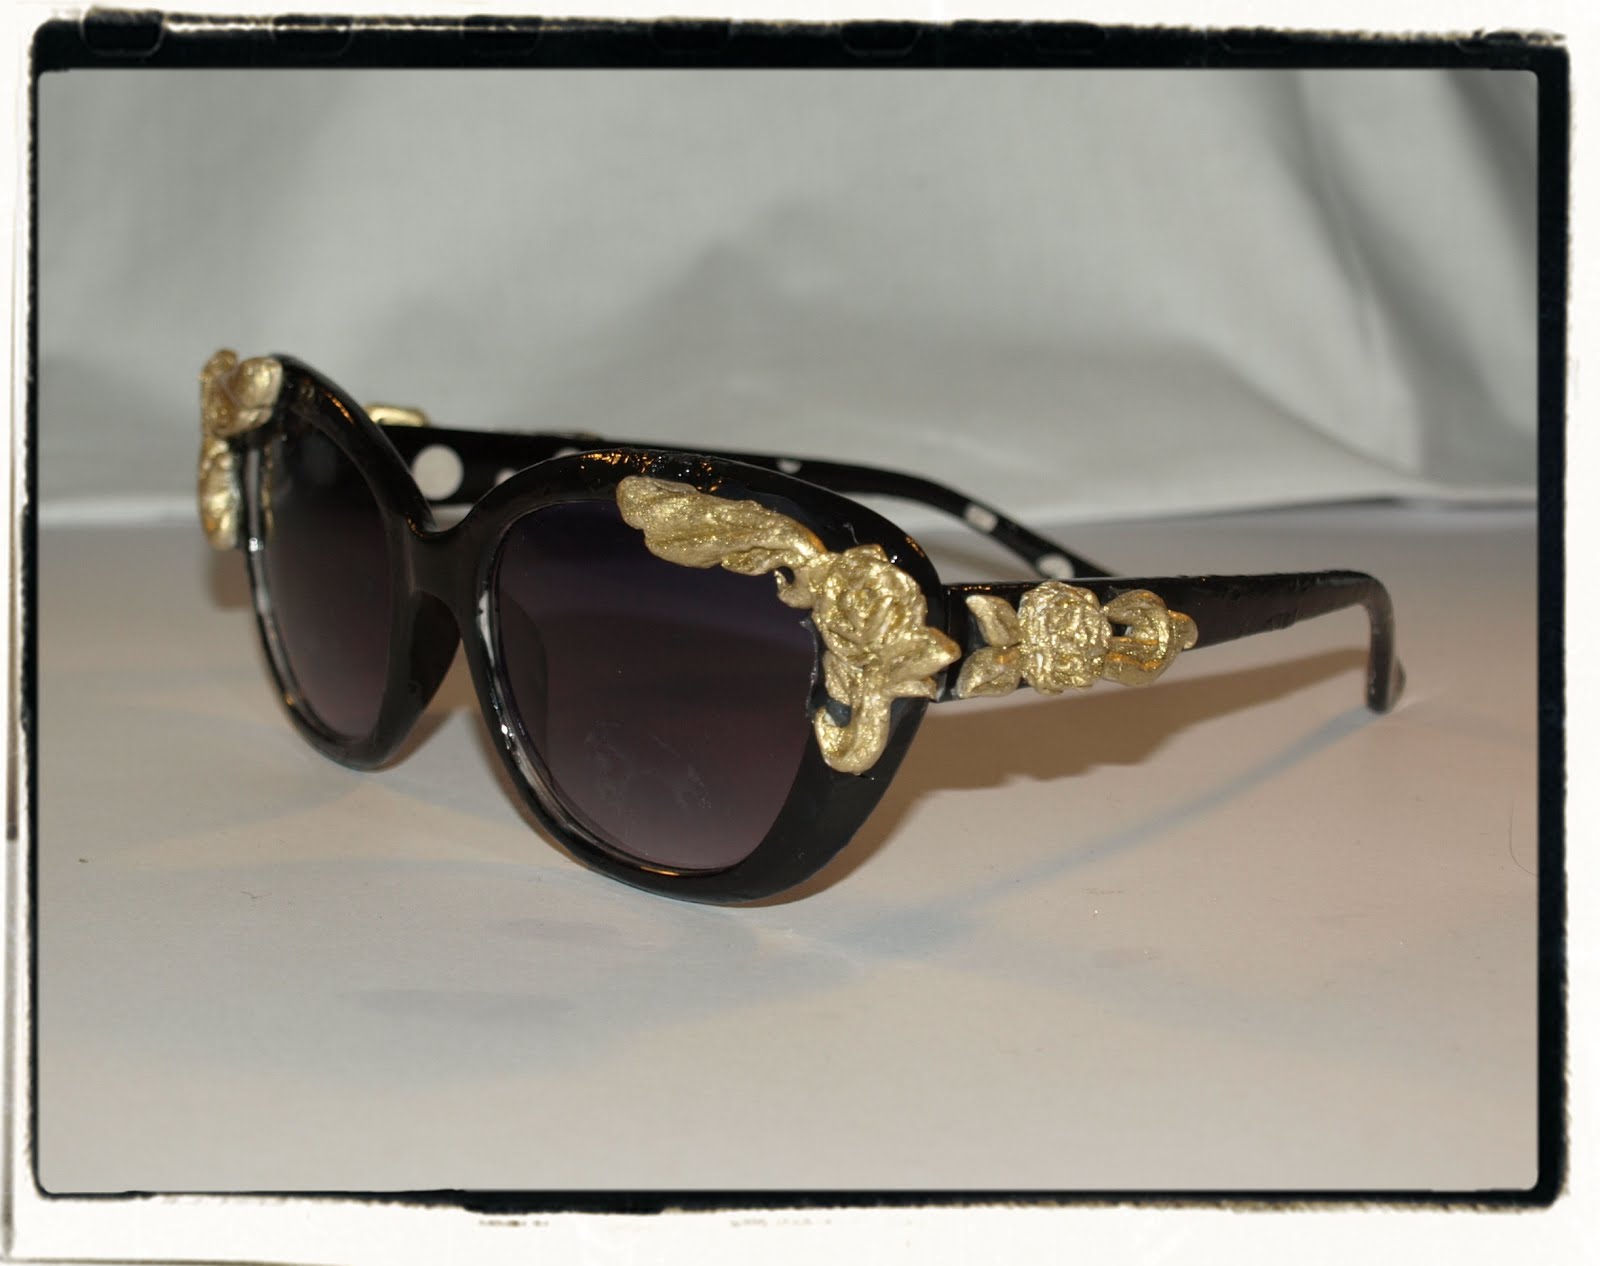
Go for Baroque - How to DIY Dolce & Gabbana-inspired cat eye sunglasses

Whoever said silence was golden clearly hadn't seen Dolce & Gabbana's epic statement sunglasses!


You will need

Black cat eye sunglasses (mine were £1 from Primark, no haggling required!)


Polymer clay (about £2 in most craft shops but prices may vary)


Gold polymer clay powder by Fimo (£3.25 at play.com)


Clear car lacquer (£3.49 with postage and packing on Ebay)


Scalpel (potentially deadly - what's your price?... Just kidding!)


Glue gun


Difficulty


Quite easy

It would depend on how fussy you want to make your clay design and how confident a small-scale sculptor you are, but if you follow my tips, it is easy once you know how.


Time

2 hours, excluding clay baking time and various drying times. The former will vary according to your choice of clay but they tend to need around half an hour or less.


Going for baroque...


If, like me, you're meticulous to an anal degree, you might want to sketch out two shapes for your flower designs - one for the top corners of the frames and one for the temples - and trace them through on both sides as a guide. This is to make sure that your shapes are more or less symmetrical and not a random hodge-podge. We don't do hodge-podges here at Chic Cheat, nor do we recommend you do such a thing!


As I mentioned, you're using your templates as a guideline. The best method for ornate leafy. rosy patterns that I know is to roll your clay into long sausagey shapes (ahem, no smirking please, ladies!), cut lines into them with a scalpel  and smooth them along the sides so that they have a kind of v-shaped cross-section and, thus, a faceted look.

For the roses, squash down domed, circular blob of clay and furrow holes out of it with a scalpel, pulling the clay above it up as you go along and creating a petal-like texture.


Once you've sculpted all your (master-)pieces, paint them with your gold powder and water, leave to dry (they may still molt slightly so try to avoid touching them) I'd recommend carrying them on a piece of paper to the oven for baking. Follow the instructions closely (unlike I once did when I misread 240°F for 240°C, resulting in an acrid mess - just throwing the idea out there!) and bake your clay.


Next, you'll need a good fixative. I used clear car lacquer. Just give your pieces one blast of it and leave them for a few minutes to dry.


Stick your pieces in place with a glue gun.

And finally...


...there you have it!


Sunday, 24 February 2013

DIY of the Tiger - How to craft a Kenzo tiger-embroidered sweater

Easy tiger - well easy when you know how - with inspiration courtesy of Kenzo.

Image: Coolspotters.com


You will need

A sweatshirt (mine was £6 from Primark)

Soft fabric interfacing

A4 printer and paper

Iron and ironing board

Differently coloured marker pens

Scalpel

Small all-purpose scissors

Pins

Sewing machine (make sure it can do a basic zigzag stitch)

About 4 differently coloured threads (I chose bright yellow, lime green, dark purple and lilac)

Felt in 4 different colours (I chose orange, pink, purple and navy)

Gemstone and fabric glue (£2.99 from Hobbycraft)


Difficulty

Medium 

This turned out slightly more challenging than I expected, purely from trying to get the sewing neat.


Time

8 hours - I think. I didn't time this one too fantastically. My schedule was such that the whole process was a bit stop-start (also, when you're filming and editing video tutorials the process always takes much longer) so it was hard to tell.


Here's a printable copy of the template I drafted up:


Sunday, 10 February 2013

Take your pixels - How to DIY Orla Kiely's pixellated galleon designand Topshop's geometric jewellery

90s retro pixel designs, graph paper... you do the math.


Left image: Asos.com

You will need


Graph paper ( with 5mm x 5mm squares)


For the jewellery

Fimo clay

Fluorescent nail polishes (available in a pack of 4, costing £2 from Primark)

Scalpel

Pencil

Clear car body lacquer (£3.99 at Elliots)

For the Galleon top

Black cardigan

Pins and a sewing machine (for taking in the sides)

Neon yellow and white jersey (in my case, cut off old clothes)

Scalpel

Sharp thread scissors

Pencil

Iron and ironing board


Time

About an hour for each one, not including baking time in the case of the jewellery.

Difficulty


Pretty Easy

Modelling the clay for the jewellery takes quite a bit of patience but thankfully it's not technically taxing. Just take your time.


To make the jewellery...

Draw your shapes onto your graph paper using the grid-like layout as a guide to get your jagged, pixellated edges.

Use your scalpel to cut out your shapes, zigzagging along the edges and using the sharp edge to gouge out the middle once you have cut an outline.


Bake your clay shapes in the oven closely following the instructions provided (if it's Fimo, it will probably be half an hour on a low heat but don't take my word for it, refer closely to the specifications on the packaging!). Paint your nail polish onto both sides and glaze your pieces with an all-over spray of clear lacquer.


Glue in place any attachments and fastenings for your jewellery, whether they be for brooches, earrings or pendants.


For the top...

Using your graph paper as a guide, draw out your ship design, which includes the yellow backdrop. Cut all your pieces out with a scalpel.


Glue them to your bondaweb and iron it onto your clothes.


Cut out your bondaweb and fabric pieces with your sharp thread scissors.


Peel away your bondaweb backing (the paper stuff on the back) and iron your pieces in place.


Pick your DIY collaboration


7 DIY bloggers

A  50-picture-strong (and counting) Pinterest board of SS 2013 fashion with...

2 weeks of voting time:


YOU, DEAR READERS, will decide how to make us busy!


pin, like or re-pin the pictures on this board and the ideas with the highest number of pins will be realized!!


The DIY bloggers joining me are:


Alessia from Matter of Style

Carly from Chic Steals

Donatella from Inspiration & Realisation

Cat from Cut Out & Keep

Sylvia from Dare to DIY

Auna from La Vie En Rose


Make sure it's your must-haves that come into DIY fruition - and happy voting!

Sunday, 3 February 2013

DIY Digest: On Target

My quick. quirky quandary-solver was inspired by the marbled bangles from Prabal Gurung's recent collection for Target...


...and also those awkward occasions when you unwittingly treat yourself to a fabulous nail varnish, only to find you never wear it, be it for work or spare-time related reasons (let's be honest, is there really such a thing as adequately quick-drying nail polish on a 5-minute time budget when you're always late by default?). Worse still is when you find yourself repeating the error enough times to find yourself with a mountain of unused, semi-congealed nail polishes you can't find time to use or bear to throw away, like I did! While they do make fabulous dressing table ornaments - especially if you arrange them in rainbow-spectrum-style - it's always more satisfying to put them to good use, and to a find a way to slip them on in the space of two seconds!

You will need

5-8 differently coloured nail varnishes. (it helps if they work as colour combinations)

Bangles, ideally silver but any colour will do, metal or plastic. I picked mine up for £2 on the sale from H & M

Clear car lacquer


Difficulty

Very easy

...Granted it's even easier to make a mess if you're not careful but picky, picky!


Time 

10 minutes


Nailing it!