My next stop on the top trend trail is in pastel camp, not merely because it's set to continue as a directional statement into the winter (on the authority of style.com at least) but because the pastel palette remains among the most timeless of classics, always giving clothing an ethereal, feminine quality when it comes back into vogue. The autumn/ winter 2013 shows offered a plethora of interpretations, including fifties silver screen chic at Louis Vuitton and sumptuous textured fur at Jonathan Saunders. Certainly classic cinematic-inspired couture has had its day in the cultural limelight recently, with Miuccia Prada working her magic touch on the costumes for The Great Gatsby, and with that in turn, inspiring a roaringly good twenties fashion revival. What lies ahead in fashion looks to the past with a confection of classic colours and retro pastiche to choose from. Let the good times roll!
Wednesday, 29 May 2013
Sunday, 19 May 2013
Boxy Clever - How to DIY a Givenchy Geometric Paisley Blouse
Giving it some Givenchy with an old shirt, vintage scarf and fabric offcuts.
Here's a DIY-scapade I thought I'd share with you, both to whet your creative appetites and show you that if you keep hold of old scarves, fabrics and clothes (and find yourself coveting a £1200 Givenchy blouse worn by Rihanna and Fergie) you never know what creatively motivated rewards you may reap. Both the aforementioned stars stepped out in the Givenchy boxy paisley printed check blouse (okay, RiRi's was the bomber jacket version but picky picky!) and I wanted in - to be in a geometric vintage silky piece de resistance, that is!
Sadly, this one's a long'un requiring a lot of neat hand stitching, namely the slip stitch.
Ruler, patternmaster or graded setsquare
Blue fabric paint (make sure it's intended for dark fabrics)
Iron all your Bondaweb onto the wrong side of your scarf (where applicable) and satin fabric.
Pin your pattern paper to the back of your shirt and trace the outline.
Unpin your shirt and, referring to the original, trace out some similar geometric designs or whichever shapes you wish to use for your DIY version. You may want to use a ruler, patternmaster or graded setsquare, which will also come in useful for giving your pieces a 1cm seam allowance. Otherwise, you can use a fine pen of tailor’s chalk pencil to trace out your pieces and cut closely around them.
Make sure you’re clear as to which pieces are meant for your satin and which are meant for you scarf (label them if necessary).
Cut your pieces out, fold the seam allowance back on itself and iron it in place. If your seam allowance is 1cm then eyeball it, like I did, otherwise, fold along the lines you traced.
Hint: Bondaweb glue can get quite messy when ironed, so try to press with the edge of your iron and keep to the edge of the fabric, away from the adhesive.
Iron your pieces in place and slip stitch the edges down. You might want to use your pins to get your placing exact.
Optional extra:
You can use some blue or navy fabric paint for dark backgrounds to get the same subtle navy patterns that the original has, if you want some extra real McCoy authenticity.
Here's a DIY-scapade I thought I'd share with you, both to whet your creative appetites and show you that if you keep hold of old scarves, fabrics and clothes (and find yourself coveting a £1200 Givenchy blouse worn by Rihanna and Fergie) you never know what creatively motivated rewards you may reap. Both the aforementioned stars stepped out in the Givenchy boxy paisley printed check blouse (okay, RiRi's was the bomber jacket version but picky picky!) and I wanted in - to be in a geometric vintage silky piece de resistance, that is!
Difficulty
So-so
In principle, the method's straightforward but it does have some fiddly bits and requires a lot of patience (as well as mild hoarder tendencies like I have!)Time
20+ hoursSadly, this one's a long'un requiring a lot of neat hand stitching, namely the slip stitch.
You will need...
A black blouse and...Optional extras:
Tailor's chalk or gel penRuler, patternmaster or graded setsquare
Blue fabric paint (make sure it's intended for dark fabrics)
Iron all your Bondaweb onto the wrong side of your scarf (where applicable) and satin fabric.
Pin your pattern paper to the back of your shirt and trace the outline.
Unpin your shirt and, referring to the original, trace out some similar geometric designs or whichever shapes you wish to use for your DIY version. You may want to use a ruler, patternmaster or graded setsquare, which will also come in useful for giving your pieces a 1cm seam allowance. Otherwise, you can use a fine pen of tailor’s chalk pencil to trace out your pieces and cut closely around them.
Make sure you’re clear as to which pieces are meant for your satin and which are meant for you scarf (label them if necessary).
Cut your pieces out, fold the seam allowance back on itself and iron it in place. If your seam allowance is 1cm then eyeball it, like I did, otherwise, fold along the lines you traced.
Hint: Bondaweb glue can get quite messy when ironed, so try to press with the edge of your iron and keep to the edge of the fabric, away from the adhesive.
Iron your pieces in place and slip stitch the edges down. You might want to use your pins to get your placing exact.
…And there you have it:
Optional extra:
You can use some blue or navy fabric paint for dark backgrounds to get the same subtle navy patterns that the original has, if you want some extra real McCoy authenticity.
Monday, 6 May 2013
Of Gems and Geometry: How to DIY a 3D geometric necklace
Still inspired by the geometric 3D jewellery trend? Got an hour to kill? Need inspiration? Chic Cheat can help...
Here's a picture showing how I constructed the pyramids by adding extra sides, only I also inserted them into pieces of straw (again, not pictured).I also threaded the wire through a jump ring at the top.
After I made each pyramid, I threaded the cord through the jump rings at the top and alternated them with a 3cm straw "stoppers" so that they stayed spread out.
You will need...
Gold picture hanging wire (about £1.50 from Wilkinson)
About 5 black drinking straws (free at all participating restaurants)
Scissors
The string of an old necklace or pendant
Long nosed pliers
Ruler
For the method I used...
Polymer clay
Fimo gold powder (about £3 if you shop around)
Difficulty
Pretty easy
A little fiddly in places and picture hanging wire splits really easily, which can be a headache when you're trying to join pieces together.
Time
I'm going to say an hour each but, thanks to nearby distractions, I think I made heavier weather of it than I needed to. Also, I'd recommend a quicker, simpler method than the one I did (and learnt from) as I'll explain later on.
Wire it up...
I constructed each pyramid by making 3 flat wire triangles, joining the ends together by bending them back on themselves, hooking them together and locking them in place with a twist of the pliers; I inserted them into pieces of straw as I went along (not pictured). Each side was 3cm long.
After I made each pyramid, I threaded the cord through the jump rings at the top and alternated them with a 3cm straw "stoppers" so that they stayed spread out.
Sunday, 28 April 2013
Pump Action: How to DIY a pair of Charlotte Olympia Ooh La La Pumps
Charlotte Olympia gives this season's pump trend a bit of "Ooh La La"...
Mark out where you intend for your lace hearts to go. Make sure it's in the same place on both shoes and that you've left enough space for slight overlapping so that you can glue your pieces in place.
Cut out your heart shapes slowly and carefully, so that your stanley knife doesn't slip, causing you to unexpectedly maul the entire shoe!
Blast your ribbon with craft mount (on the wrong side) and fold it in half so that it's pipe-like and slightly more rigid.
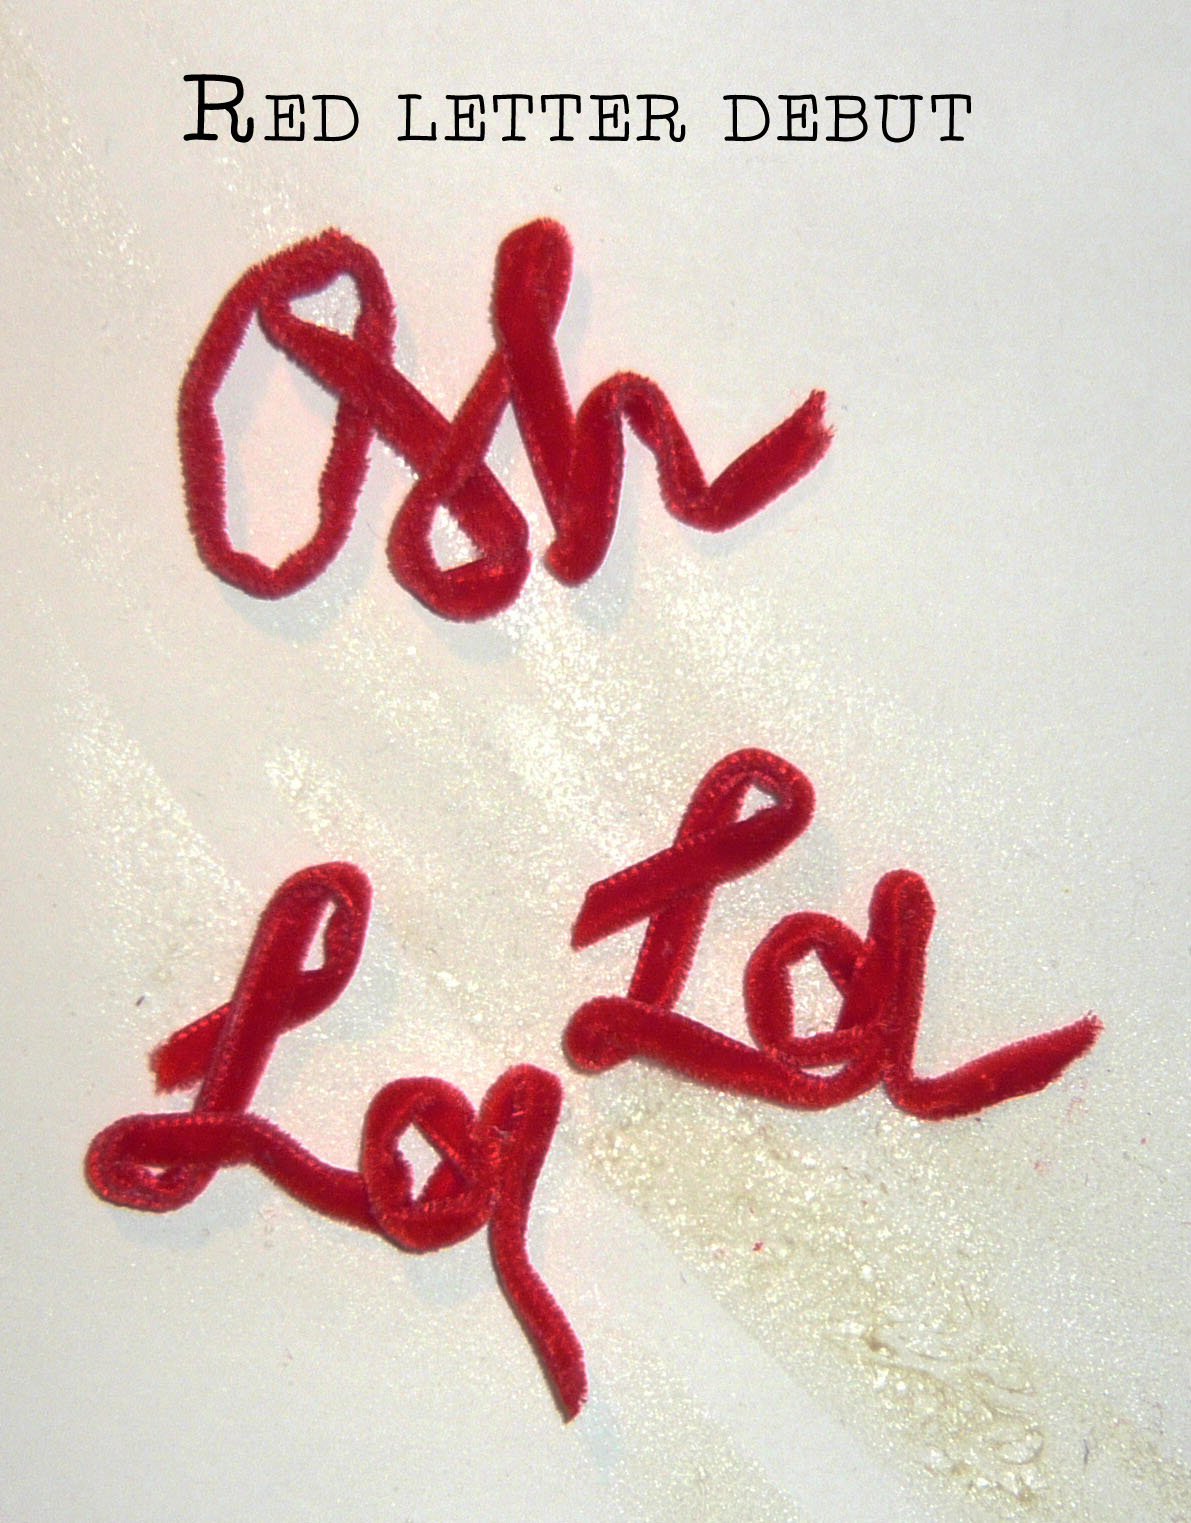
Using your glue gun, model your "Ooh La La" lettering, making sure it fits onto your lace hearts.
Glue your lace hearts in place, again, with your glue gun (craft mount would be a bit messy).
Glue your red ribbon in place one letter at a time - don't try to do whole words as gun glue is very quick-drying. Don't panic if you make a bit of a mess, as the glue is easy to peel off once dry, especially with tweezers. Failing that, use a scalpel to scrape away the excess glue.
Difficulty
Quite Easy
Getting it perfectly neat's a little trickier as it involves glue guns, which I find messy by their very nature, but this DIY's as straightforward and intuitive as it gets.Time
2-3 hours. Well, probably less as I faffed about quite a bit when I was working on it!You will need...
To get the shoe on the road...
Mark out where you intend for your lace hearts to go. Make sure it's in the same place on both shoes and that you've left enough space for slight overlapping so that you can glue your pieces in place.
Cut out your heart shapes slowly and carefully, so that your stanley knife doesn't slip, causing you to unexpectedly maul the entire shoe!
Blast your ribbon with craft mount (on the wrong side) and fold it in half so that it's pipe-like and slightly more rigid.
Using your glue gun, model your "Ooh La La" lettering, making sure it fits onto your lace hearts.
Glue your lace hearts in place, again, with your glue gun (craft mount would be a bit messy).
Glue your red ribbon in place one letter at a time - don't try to do whole words as gun glue is very quick-drying. Don't panic if you make a bit of a mess, as the glue is easy to peel off once dry, especially with tweezers. Failing that, use a scalpel to scrape away the excess glue.
Sunday, 21 April 2013
Pur Sang: How to DIY a Sang A clutch
With an easy-peasy pleather-recycling homage to the much-coveted V clutch by Sang A - recommended by Style.com, no less - I give you another DIY doddle that's doable in an evening.
A sewing machine with a leather needle nothing too technical, available at all good haberdashers and a precaution that’s definitely worth taking. Conventional needles aren’t strong enough and tend to break.
Craft mount
Piercing tool which looks like a scalpel but is pointed at the end.
All-purpose scissors
4 sheets of A4 paper and masking tape
Pencil Preferably a clutch pencil, either way, make sure it’s sharp.
Patternmaster or graded setsquare
Gold gel pen
Black polymer clay
Gunmetal bag chain about 150cm long. I know it sound like a lot but it is for a cross body bag.
Silver picture hanging wire
Glue gun
Trace out the above pattern pieces onto paper using the measurements provided. You’ll need to tape 2 sheets together for the bottom right-hand piece. Cut your pieces out.
Trace the piece in the top left-hand corner onto white leather/ faux leather and the other two pieces onto black (onto the wrong sides) using the gold gel pen. Cut them out. Trace out the bottom left-side pattern in white twice, without the seam allowance.
Prod holes in your black pieces and triangular white piece.
Place your black pieces right-side-to-right-side and machine sew them together along the sides and bottom. Trim away the sides, leaving one layer slightly wider than the other. This makes it easier to turn your bag inside-out and prevents excess bulk and distortion.
Craft mount your non-triangular white pieces to your black pieces (the wrong sides, which should still be facing outwards.
With your white triangular piece, fold back the seam allowance towards the wrong side and craft mount it down.
Turn your bag right-sides-out. On the triangular part of your black pieces, fold the seam allowance back on itself, this time, towards the right side and craft mount it down. Cover that side in craft mount.
Stick your white piece down on your craft mount-covered black piece, with the right side facing outwards.
Attach your chain to the top corners by threading your picture wire through nearby holes and the end links on either side.
Make your polymer clay arrow, bake in the oven (following the instructions carefully as I trust you will!) and stick it in place with your glue gun.
You will need
About 2 square foot of black leather/ faux leather and 1 square foot in white. Both can be pretty pricey so why not cut up some old jackets. If you haven’t got one, or both, comb your local charity shop or look online.A sewing machine with a leather needle nothing too technical, available at all good haberdashers and a precaution that’s definitely worth taking. Conventional needles aren’t strong enough and tend to break.
Craft mount
Piercing tool which looks like a scalpel but is pointed at the end.
All-purpose scissors
4 sheets of A4 paper and masking tape
Pencil Preferably a clutch pencil, either way, make sure it’s sharp.
Patternmaster or graded setsquare
Gold gel pen
Black polymer clay
Gunmetal bag chain about 150cm long. I know it sound like a lot but it is for a cross body bag.
Silver picture hanging wire
Glue gun
Difficulty
Pretty easy
Don’t let a bit of machine sewing and basic pattern cutting phase you, this is among my quicker, easier outings.Time
2-3 hoursHow to make the 'V' thing
Trace out the above pattern pieces onto paper using the measurements provided. You’ll need to tape 2 sheets together for the bottom right-hand piece. Cut your pieces out.
Trace the piece in the top left-hand corner onto white leather/ faux leather and the other two pieces onto black (onto the wrong sides) using the gold gel pen. Cut them out. Trace out the bottom left-side pattern in white twice, without the seam allowance.
Prod holes in your black pieces and triangular white piece.
Place your black pieces right-side-to-right-side and machine sew them together along the sides and bottom. Trim away the sides, leaving one layer slightly wider than the other. This makes it easier to turn your bag inside-out and prevents excess bulk and distortion.
Craft mount your non-triangular white pieces to your black pieces (the wrong sides, which should still be facing outwards.
With your white triangular piece, fold back the seam allowance towards the wrong side and craft mount it down.
Turn your bag right-sides-out. On the triangular part of your black pieces, fold the seam allowance back on itself, this time, towards the right side and craft mount it down. Cover that side in craft mount.
Stick your white piece down on your craft mount-covered black piece, with the right side facing outwards.
Attach your chain to the top corners by threading your picture wire through nearby holes and the end links on either side.
Make your polymer clay arrow, bake in the oven (following the instructions carefully as I trust you will!) and stick it in place with your glue gun.
Sunday, 14 April 2013
Katrantzou's got the cream: How to DIY a Mary Katrantzou print clutch
Make a big impression with bold print, courtesy of Katrantzou.
Paper (If your bag isn't made from it, like mine)
Craft Mount (Again, if your bag isn't made from paper)
Pencil and eraser
Felt tips (as many colours as possible. Mine were spares from home and a bog standard Crayola set from Hobbycraft costing £3.99)
Clear car lacquer
If you aren't working straight onto paper, craft mount a sheet to the front and back of your bag, even if you're not doing both sides, just for consistency. Use your pencil and eraser to sketch out your design.
Colour them in (woohoo!)
Blast the whole bag with clear car lacquer.
You will need
A zipped bag (Mine was actually made from strong paper and came from this Ebay seller)Paper (If your bag isn't made from it, like mine)
Craft Mount (Again, if your bag isn't made from paper)
Pencil and eraser
Felt tips (as many colours as possible. Mine were spares from home and a bog standard Crayola set from Hobbycraft costing £3.99)
Clear car lacquer
Difficulty
Very Easy
...And I bet there you were thinking colouring in was for kids!Time
Mine took about 5 hours but it depends on the designs you choose to do.
Operation cut, stick 'n' colour...
If you aren't working straight onto paper, craft mount a sheet to the front and back of your bag, even if you're not doing both sides, just for consistency. Use your pencil and eraser to sketch out your design.
Colour them in (woohoo!)
Blast the whole bag with clear car lacquer.
Sunday, 7 April 2013
Acid Reign - How to DIY a basic pair of acid washed jeans
Drench and distress your denim for an on-trend spring/ summer staple.
Party on, the '90s are back - in fashion, anyway! If you’ll take some time to let it sink in, some 20 years have passed since the fearful decade of post cold-war tensions, millennium bug fear and even novelty scrunchies. It really does feel like yesterday, or rather today with this nostalgic levity of 90s retro upon us. 2013 fashion has, so far, been dominated by brilliant neons, sombre grunge-inspired palettes and, yes, once again there’s no getting away from customised denim this season. So, why awaken the ghost now? Maybe it’s because 90s teens are now consumers, with the requisite disposable incomes to really “live the dream” or view their youth through rose-tinted glasses ( à la Gallagher, perchance? We’ve still got the Britpop aesthetic to work with). Maybe it’s because the current teen generation are too young to remember how insufferably cheesy it all was the first time around. Maybe, just maybe, it’s because fashion moves in cycles with a chronological algorithm of what is romantic, retro or plain passé. According to Alison Lurie’s book, The Language of Clothes, fashion a year after its time is “dowdy,” 10 years after is “hideous” and 20 years after is “ridiculous,” (that said, it was written in 1981, making it, like, so stuck in the 80s and “amusing” by its own standards!)
Yves Saint-Laurent’s recent grunge-inspired show had Courtney Love ecstatically tweeting her “’gasms” at the idea of rich ladies buying what she used to wear in years gone by “finally (with) no beanies.” As a 90s teen, myself, I’d say that reference was just the tip of the iceberg from a generation of assorted tastes and “scenes” with fashion and music joined at the hip. Into your acid and trance? Neons at the ready. Disaffected and rock ‘n’ roll? Distressed Americana-flavoured grunge. Fans of girlband and boyband pop? It’s all about the denim. As the saying goes, "plus ça change..." It's no wonder we’re getting designer déjà vu in a 90s-style climate of sky-high youth unemployment, corporate greed, worldwide religious and political unrest and many a damning question of exactly what goes into your supermarket beef burgers!
So, on that happy note, who wants some acid?
Dylon fabric dye (about £3) I'd recommend a colour within the region of purple, red or burgundy but, needless to say, it's up to you
Thick bleach
Sponge
Rubber gloves (trust me, your hands will thank you for using them!)
Plastic wash basin
A good area for making a mess. I used my shower
Actual time you need to spend working on it: Half an hour to an hour
Do you see where I'm going with this? This is practically a DIY that does itself. You just have to chip in and guide it at certain intervals with the instructions I'm about to give you. It's a great project to do in conjunction with other things, or to plan other activities around, while you wait.
Squirt some bleach in wavy lines all over your jeans and spread it using your sponge.
Leave to dry.
Following the instructions provided carefully and to the letter, as I'm sure you will, mix your dye in your wash basin and leave your jeans to soak.
45 minutes later, hang your jeans up to dry and, if you fancy, give them one last swirling squirt with bleach for luck, like I did.
Party on, the '90s are back - in fashion, anyway! If you’ll take some time to let it sink in, some 20 years have passed since the fearful decade of post cold-war tensions, millennium bug fear and even novelty scrunchies. It really does feel like yesterday, or rather today with this nostalgic levity of 90s retro upon us. 2013 fashion has, so far, been dominated by brilliant neons, sombre grunge-inspired palettes and, yes, once again there’s no getting away from customised denim this season. So, why awaken the ghost now? Maybe it’s because 90s teens are now consumers, with the requisite disposable incomes to really “live the dream” or view their youth through rose-tinted glasses ( à la Gallagher, perchance? We’ve still got the Britpop aesthetic to work with). Maybe it’s because the current teen generation are too young to remember how insufferably cheesy it all was the first time around. Maybe, just maybe, it’s because fashion moves in cycles with a chronological algorithm of what is romantic, retro or plain passé. According to Alison Lurie’s book, The Language of Clothes, fashion a year after its time is “dowdy,” 10 years after is “hideous” and 20 years after is “ridiculous,” (that said, it was written in 1981, making it, like, so stuck in the 80s and “amusing” by its own standards!)
Yves Saint-Laurent’s recent grunge-inspired show had Courtney Love ecstatically tweeting her “’gasms” at the idea of rich ladies buying what she used to wear in years gone by “finally (with) no beanies.” As a 90s teen, myself, I’d say that reference was just the tip of the iceberg from a generation of assorted tastes and “scenes” with fashion and music joined at the hip. Into your acid and trance? Neons at the ready. Disaffected and rock ‘n’ roll? Distressed Americana-flavoured grunge. Fans of girlband and boyband pop? It’s all about the denim. As the saying goes, "plus ça change..." It's no wonder we’re getting designer déjà vu in a 90s-style climate of sky-high youth unemployment, corporate greed, worldwide religious and political unrest and many a damning question of exactly what goes into your supermarket beef burgers!
So, on that happy note, who wants some acid?
You will need
Jeans (shout out to my gal the Frenetic Fox for her much appreciated donation)Dylon fabric dye (about £3) I'd recommend a colour within the region of purple, red or burgundy but, needless to say, it's up to you
Thick bleach
Sponge
Rubber gloves (trust me, your hands will thank you for using them!)
Plastic wash basin
A good area for making a mess. I used my shower
Difficulty
Very easy and totally rad!
The only remotely difficult thing about this one's not making a mess, so while I'd like to stress the need for appropriate precautions to be taken (Clue: Wear clothes you don't mind ruining and keep well clear of soft furnishings) it's a DIY fashion breeze. Cowabunga!Time
Total time including drying and soaking: 5 - 10 hoursActual time you need to spend working on it: Half an hour to an hour
Do you see where I'm going with this? This is practically a DIY that does itself. You just have to chip in and guide it at certain intervals with the instructions I'm about to give you. It's a great project to do in conjunction with other things, or to plan other activities around, while you wait.
Bring on the acid...
Squirt some bleach in wavy lines all over your jeans and spread it using your sponge.
Leave to dry.
Following the instructions provided carefully and to the letter, as I'm sure you will, mix your dye in your wash basin and leave your jeans to soak.
45 minutes later, hang your jeans up to dry and, if you fancy, give them one last swirling squirt with bleach for luck, like I did.
Subscribe to:
Posts (Atom)